RSS Feed

Category Archives: Dying Clothes

Inexpensive Tricks to Updating Your Wardrobe

4 Dye Tips
One of my most popular blog post is a tutorial on how I dyed a few clothing items.  Click here to read. I have done several other dye baths over the last few years and had some great success in updating a few items for my daughter and I that were more conducive to Dressing Our Truths. I’ve toned down an orange sweater and workout top using Pearl Gray. I also found my daughters favorite sweater on clearance in the same color she already had so we dyed it!

This morning I came across this article about dying tips and I wanted to share.  I was in the sauna at the gym {I love the Sauna as you can sit in there and sweat liked you work out while you read and learn things with only lifting a finger to pick up your magazine!}…it seems all the magazines are out dated but, this one said February so I thought it was current…it is from last year…Lucky Magazine February 2011! None the less I’m glad I picked it up!
Dye tip #1
dye tip 1
So this tip is pretty much the basic dying that I show you in my tutorial.  They do things slightly different but, the concept is the same taking light to dark.
Dye Tip #2
dye tip 2
This tip is about dying cottons, silks and synthetics. Again pretty much using the same Rit dye method but, they do it slightly different. What intrigued me the most with this was how they took dark colored clothes to light colors and I’m guessing they use the color reducer…they don’t share how they did that!  I need to do some more research into how they did this because taking something black to a pretty blue color would be wonderful for all of us who dress our truths and don’t wear black!
Dye Tip #3
dye tip 3
This tip is for dying Cashmere and Wool and suggest using an acid dye by Jacquard…it uses vinegar not acid so don’t get scared like I did!  The article suggest is cost about $4.69 at http://www.wardrobesupplies.com/. {FYI..I’m just passing along the info and in no way affiliated with the magazine or website or getting compensated}
Dye Tip #4
dye tip 4
This one really intrigued me and I have wondered how to dye leather. I’ve tried spray painting leather and it doesn’t work well…spray paint works fine on synthetic shoes but, not leather. They show in tip 2 taking black leather shoes to white and in tip 4 they answered my question on the leather dye. How many times do you find a comfortable pair of shoes or have a pair you love but, they need to be a different color or just given new life?  Here is your answer! Tarrago Leather dye $6.95 at Wardrobe Supplies.
Again this article is found here online and you can go read up and watch the video’s as well.  I think I will be ordering some leather dye to try!
Linking to:
At the Picket Fence, Funky Junk Interiors, A Simply Klassic Home, Not Just A Housewife, Meet Me Mondays, A Bowl Full of Lemons, It’s Overflowing, Chatty Chics, Southern Product Queen, Share The Wealth Wednesday, Some What Simple

1 Old T-Shirt = Headband, Scarf and Necklace–No Sew

T-shirt flower, scarf, necklace, headband 001
Yes all made out of an old gray t-shirt and no sewing!
So if I would have thought to do this during the day my pictures would be much better for a tutorial but, sometimes I feel crafty when it isn’t the most convenient lighting opportunity! After all “real” life isn’t always blog picture perfect! I started making just 1 of these and then realized I had enough fabric to just keep going…once I got started I wasn’t going to stop until I finished all 3!
You will need 1 large old t-shirt, scissors, fabric glue or I used hot glue, fabric flower and felt.
*Side Note – If you don’t like the color of your t-shirt or it is one of Daddy’s not so white t-shirts anymore, use my Drab to Fab clothes dying tutorial to make this project even better!
Start with your old t-shirt laid out flat and start cutting 1 inch strips off the bottom.
IMG_1086
I used my new self healing cutting matt and rotary cutter which worked great but, scissors will work just fine and it doesn’t have to be perfectly straight or smooth straight edges…just cut away. You should have a nice long round band. Cut 5 of those and then holding in both ends stretch bands and fabric will naturally curl up. Gather them up and tie a piece of fabric around them to hold together and clip or glue a flower over the tie or just clip a flower on like I did.
tshirt designs 003 copytshirt necklace 001 copy
Wear them long or twist them around for a short necklace.
Next I cut a 2 inch wide band the same way as above and set it aside for your headband. (Or after thought – the edge of the sleeve might be perfect size to fit around your head) Then I cut 3 strips each slightly different widths to make the flowers. Twist your band and then let the band roll up on itself making it half its size.
IMG_1096IMG_1102
Next tie the ends together so you have one strip. The knot will be the center of your flower. Pinch the center and start dabbing glue and apply pressure as you glue the strip in a circular motion.
IMG_1110IMG_1114
When you get to the end I glued the edge under the flower. With different widths in your strips your flowers should be slightly different sizes. Arrange your flowers on your felt how you would like to wear them on your headband. You will glue your flowers onto the felt.
IMG_1144IMG_1143
Then cut the felt around the flowers to give you a nice backing to hold the flowers in place.  Then glue your felt or back of flowers on your headband.  I just tied the headband strip around my daughters head but you could determine the right size and glue or sew it to the size of your choice. Or use a band off the sleeve like I thought of afterwards.
tshirt designs 004 copy
To make the scarf you will use the remaining parts of the shirt.  Get about a 9 inch plate and use the rest of your shirt cutting out as many round circles as you can. I adapted in places to cut out the graphic on my t-shirt. It doesn’t matter if they are perfect and I even used parts of the sleeves. The more circles the more ruffles you will have.
IMG_1153IMG_1154
Next cut your circles into spirals starting at the edge about 1.5/2 inches again doesn’t have to be perfect or even.
IMG_1156
I cut 2 at a time just so that I had approximate same size ruffle for each side of my scarf but, it doesn’t matter. Next you will again pull each end and stretch it which will make the fabric curl up and form the ruffles.  I was in a hurry so I just laid out the ruffles so the ends of each of the 2 I cut crossed over each other like if I would have sewed or glued them in one long strip. After I laid all of them out I took an extra piece of left over scraps and tied all the ends together in a knot.
IMG_1181
It seems to hold it pretty well but, I might go back and glue or sew it together for a more secure option. I again gave all the ruffles a little tug and stretched the fabric. Wrap it around your neck and cute scarf!
tshirt designs 002 copy
So I still might dip my gray scarf or necklace into a dye bath but, I have about 5 other t-shirts in different colors that I can’t wait to make more of these cute items with.
This project didn’t cost me anything, even my T-shirt was a freebie, as everything I used I already had on hand. It shouldn’t take more than an 1 hour to do all 3…well if you don’t start in the late afternoon, have 5 children interrupting, you aren’t over seeing your 7 yr. old daughter making dinner, wishing happy birthdays and talking to your sister on the phone that is! It probably wasn’t the most convenient time, nor the best lighting to collect pictures of a tutorial of a project I’ve never done before but, then again when is the perfect time to get crafty? I feel great that I dug in and created something! Real Southern Living is about “REAL” Living and that life isn’t always blog picture perfect!
Linking To:
 Serenity you
Cherished Treasures
 
Chatty Chics
The Southern Product Queen
Funky Junk's Sat Nite Special

Wardrobe from Drab to Fab!

This is a re-post from a year ago! For back to school here is a great tip to turn old dingy clothes into something new and fun! Try skirts, pants, shorts, shirts…so many things you can do!
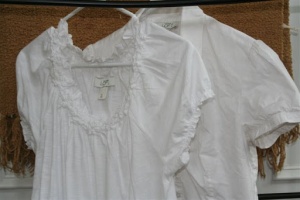
In learning to Dress My Truth I realize that bright white is just not part of my true nature so I’ve learned how to re purpose some of my white or other colored clothing to be more true to my nature.
This is a brief tutorial how I have dyed some of my clothes and given some life back to my wardrobe. I suggest going to http://www.ritdye.com/ for more detailed instructions and color recipes to make your wardrobe from Drab to Fab!
We all have those white or light colored dingy looking shirts that could use some new life. What about your kids how…how many new shirts have you bought only for your kids to wear them one time and have a stain on them…disguise that stain!
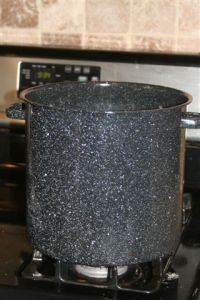
Once you pick out your clothes you want to dye. Take a very large soup pot and fill with water. I do everything on the stove but you could heat the water and poor into a large bucket to dye.
Next take a measuring cup and scoop up a cup of heated water from your pot. I used 1 Tbsp of Petal Pink and 1 tsp of pearl grey and mixed it up in my measuring cup. Make sure the dye is dissolved real good and then poor into your pot to make the dye bath.
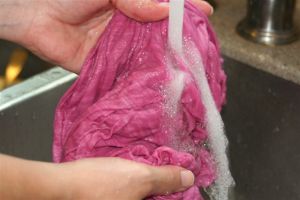
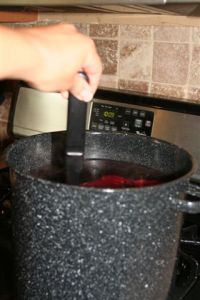
I run my clothes under cold water before placing them into the dye bath. Place in dye bath, stir it and make sure the whole garment stays down under in the bath.
(Picture of garment in pot goes here but it is missing so you can use your imagination)
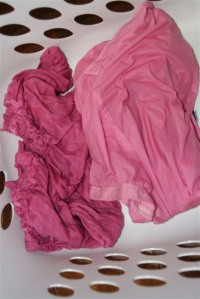
When your garment is the desired color (remember it will dry lighter) rinse in cold water. Place into a plastic laundry basket while you dye your next item.
Each dye recipe is only good for a couple of pounds of fabric at one time and the dye bath won’t be as dark for additional garments.
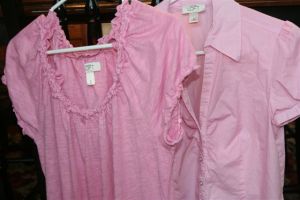
You can see a variation of color between my two shirts the difference in fabric will also play a part in the color. Also you will see that some clothing is made with thread that doesn’t dye as well so your garments seams might not dye depending on the thread type.
Once you are done dying I throw my clothes into the washer for a quick cycle and then the dryer.
Woo Hoo! It is like having 2 new shirts in my closet! Have fun experimenting and the worst thing that happens is you don’t like the color and dip them into another dye bath!
Linking up to Tip Junkie!

Tip Junkie handmade projects

Take your wardrobe from Drab to Fab!

In learning to “Dress My Truth” I realize that bright white is just not part of my true nature so I’ve learned how to re purpose some of my white or other colored clothing to be more true to my nature.

This is a brief tutorial how I have dyed some of my clothes and given some life back to my wardrobe. I suggest going to http://www.ritdye.com/ for more detailed instructions and color recipes to make your wardrobe from Drab to Fab!

We all have those white or light colored dingy looking shirts that could use some new life. What about your kids how…how many new shirts have you bought only for your kids to wear them one time and have a stain on them…disguise that stain!

Once you pick out your clothes you want to dye. Take a very large soup pot and fill with water. I do everything on the stove but you could heat the water and poor into a large bucket to dye.
Next take a measuring cup and scoop up a cup of heated water from your pot. I used 1 Tbsp of Petal Pink and 1 tsp of pearl grey and mixed it up in my measuring cup. Make sure the dye is dissolved real good and then poor into your pot to make the dye bath.
I run my clothes under cold water before placing them into the dye bath. Place in dye bath, stir it and make sure the whole garment stays down under in the bath.

(Picture of garment in pot goes here but it is missing so you can use your imagination)

When your garment is the desired color (remember it will dry lighter) rinse in cold water. Place into a plastic laundry basket while you dye your next item.
Each dye recipe is only good for a couple of pounds of fabric at one time and the dye bath won’t be as dark for additional garments.
You can see a variation of color between my two shirts the difference in fabric will also play a part in the color. Also you will see that some clothing is made with thread that doesn’t dye as well so you might see the thread not dying.
Once you are done dying I throw my clothes into the washer for a quick cycle and then the dryer.
Woo Hoo! It is like having 2 new shirts in my closet! Have fun experimenting and the worst thing that happens is you don’t like the color and dip them into another dye bath!